What is the Title Component?
The Title component allows you to add a heading to your notification bar. It’s perfect for displaying attention-grabbing text like announcements, promotions, or important messages that you want your visitors to notice immediately.
Step 1: Add the Title Component
In the visual builder, click the + Add Element button and select Title from the available components. The title will appear in your notification bar preview area.
Step 2: Enter Your Title Text
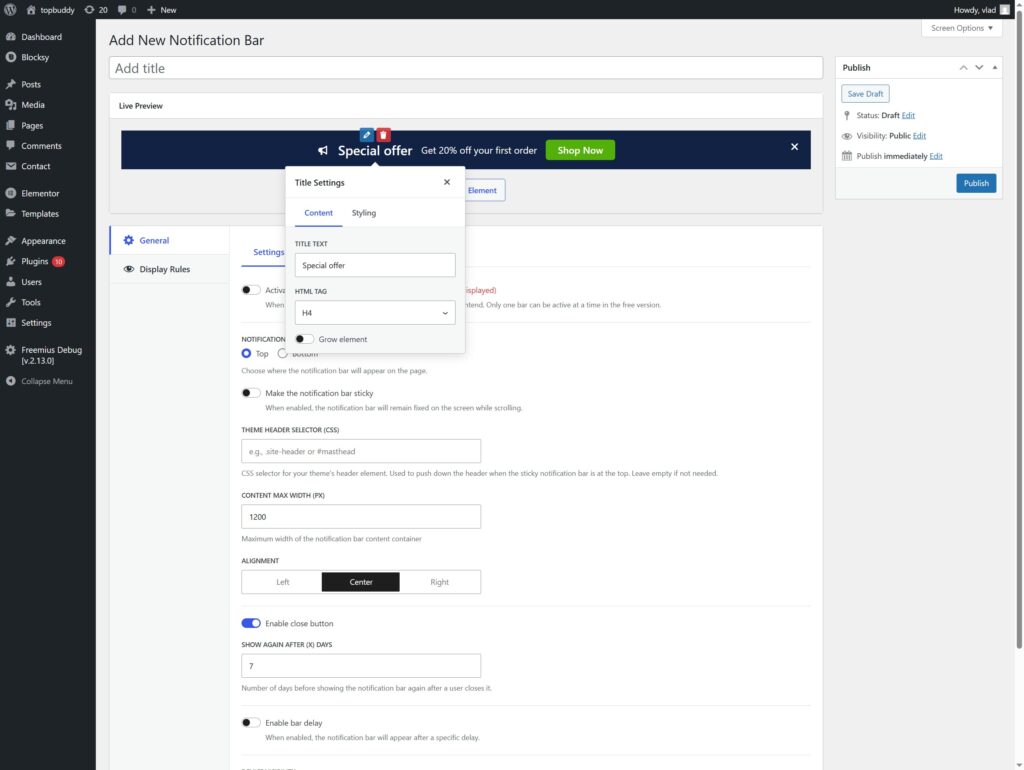
Click on the title element in the preview area to open the settings panel. In the Text field, enter the heading you want to display. This could be something like “Summer Sale – 50% Off!” or “New Arrivals Available Now”.
Step 3: Choose the HTML Tag
Select the appropriate HTML tag for your title from the dropdown options. Available choices include:
- H1 – Use for the most important heading on your page (typically only one per page);
- H2 – Use for major section headings;
- H3 through H6 – Use for subheadings with decreasing importance;
- Div – A generic container with no semantic meaning;
- Span – An inline element for styling within a line of text.
Choosing the right HTML tag helps with SEO and accessibility, as search engines and screen readers use these tags to understand your content structure.
Step 4: Adjust Font Size
Customize the size of your title text using the Font Size setting. You can choose from predefined sizes or enter a custom value. Larger font sizes make your title more prominent and ensure visitors notice your message immediately.
Consider your overall notification bar design when choosing a font size – make sure it balances well with other elements like buttons, icons, or images.
Step 5: Customize Text Color
Make your title stand out by customizing its color using the Color setting. You can select from the color picker or enter a specific hex code. Choose a color that provides good contrast with your notification bar background for optimal readability.
For example, if your notification bar has a dark background, choose a light-colored text to ensure your title is easy to read.

Step 6: Configure Margin Settings
Fine-tune the spacing around your title using the Margin settings. You can adjust margins on all sides (top, right, bottom, left) to achieve the perfect layout for your notification bar.
Proper margins help prevent your title from feeling cramped and ensure it aligns nicely with other elements in your notification bar. Increase margins to create more breathing room, or decrease them to fit more content.
Step 7: Preview and Save
Review your notification bar in the live preview to ensure the title looks exactly as you want it. Make any final adjustments to the settings, then click Publish or Update to save your changes.
Remember to activate your notification bar using the toggle in the top right corner to make it visible on your website.